
- Overview
- Account guides
- Blackboard
- Brightspace
- Administrator’s guide – How to connect PlagiarismCheck with Brightspace LTI 1.1 (Legacy)
- Instructor’s guide — How to create assignments with PlagiarismCheck in Brightspace
- Instructor’s guide — How to see submissions and access Similarity & AI reports in Brightspace
- Students’ guide — How to submit assignments and see Similarity & AI scores in Brightspace
- Administrator’s Guide – How to connect PlagiarismCheck with Brightspace LTI 1.3 (Dynamic Registration)
- Canvas
- Google Classroom
- Moodle
- Schoology
Administrator’s Guide – How to connect PlagiarismCheck with Brightspace LTI 1.3 (Dynamic Registration)
This guide walks Brightspace administrators through enabling the PlagiarismCheck.org LTI 1.3 integration using dynamic registration. Once enabled, instructors can attach PlagiarismCheck to any assignment, students submit their work directly inside Brightspace, and originality reports plus grades flow back automatically.
Before you start
You’ll need:
- Administrator access to your Brightspace instance.
- An active PlagiarismCheck.org organisation account with Admin (Owner) role. If you don’t have Admin access, but you need it, please contact us here.
Note: Brightspace splits the work in two: first you register the tool, then you deploy it to one or more org units. Dynamic registration takes care of the first step automatically; the second step is a quick form.
Step 1: Navigate to Integrations
- Login to PlagiarismCheck and follow Profile → Integrations or just click on this link https://plagiarismcheck.org/profile/integrations-list. On the list of integrations scroll until you see Brightspace.
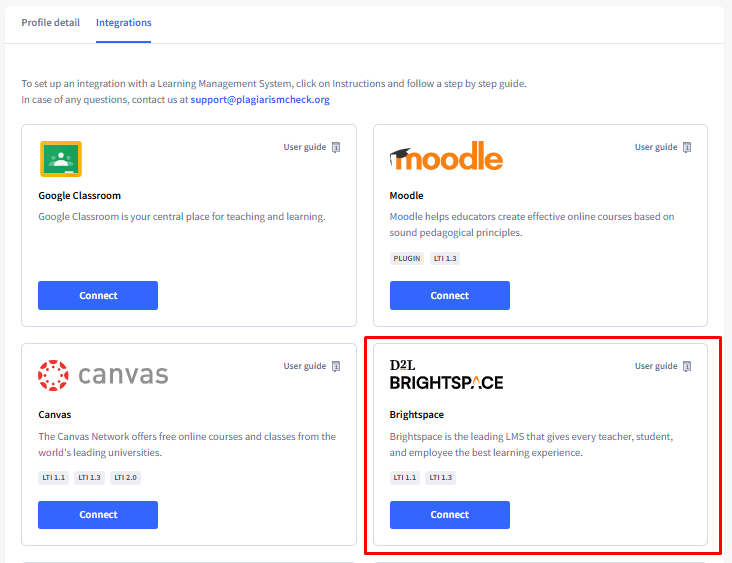
Step 2: Generate your registration URL
- On the PlagiarismCheck registration page, select Dynamic tab, click Generate registration URL and then Copy.
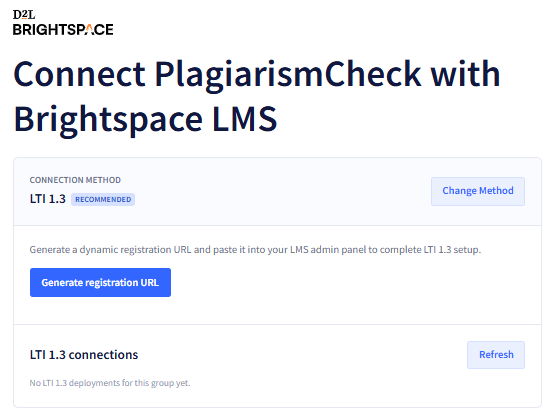
Step 3: Open External Learning Tools
- In Brightspace, click the gear icon in the top right and choose External Learning Tools. Switch to the LTI Advantage tab. Сreate a new deployment, open the Registration Help icon (?) beside the Tool field, and click on the Register link in the pop-up.
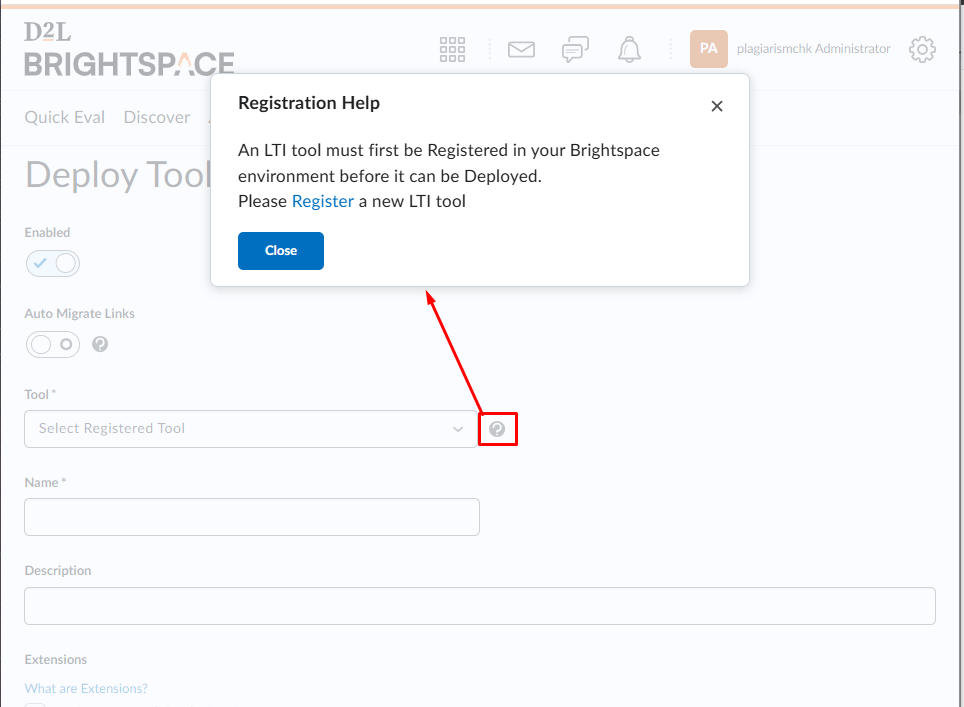
Step 4: Register the tool
- Click Register Tool. On the How would you like to register your tool? screen choose Dynamic.
- Paste the URL you copied from PlagiarismCheck (Step 2 of this guide), and then click Register. Brightspace fetches the tool’s configuration and displays a pre-populated registration form.
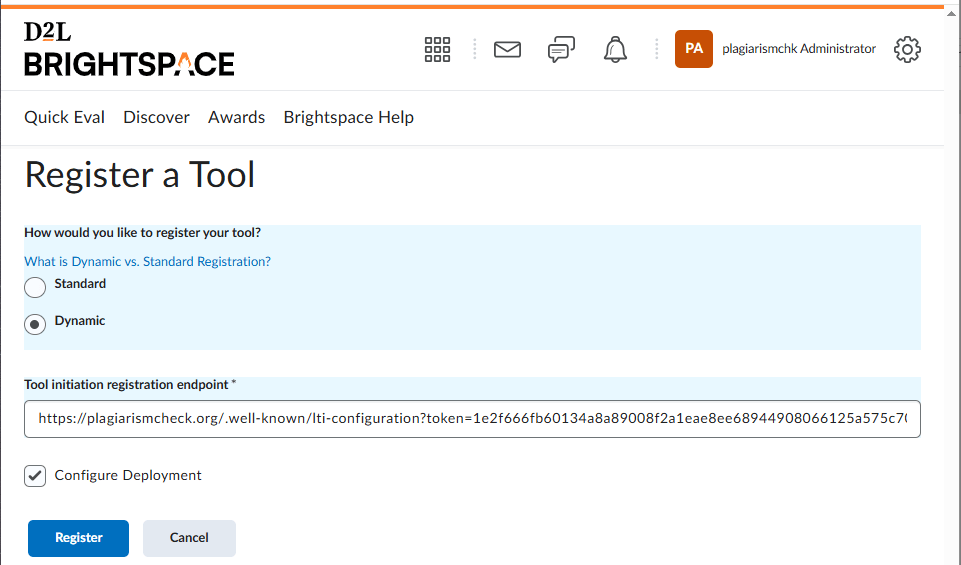
Step 5: Enable the tool
- On the registration details page Enable the tool.
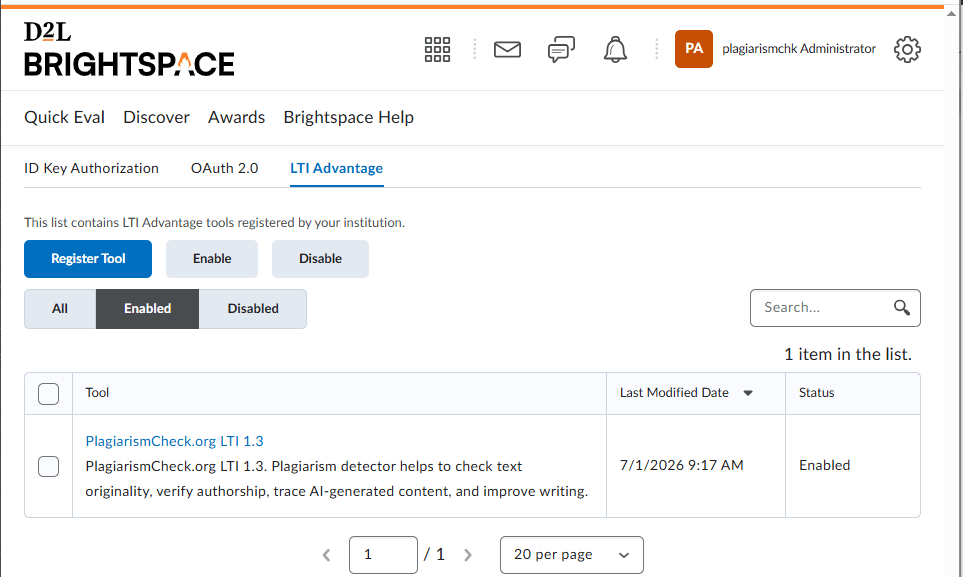
Step 6: Create a deployment
- Open the tool you created, scroll to the bottom, and click View Deployments.
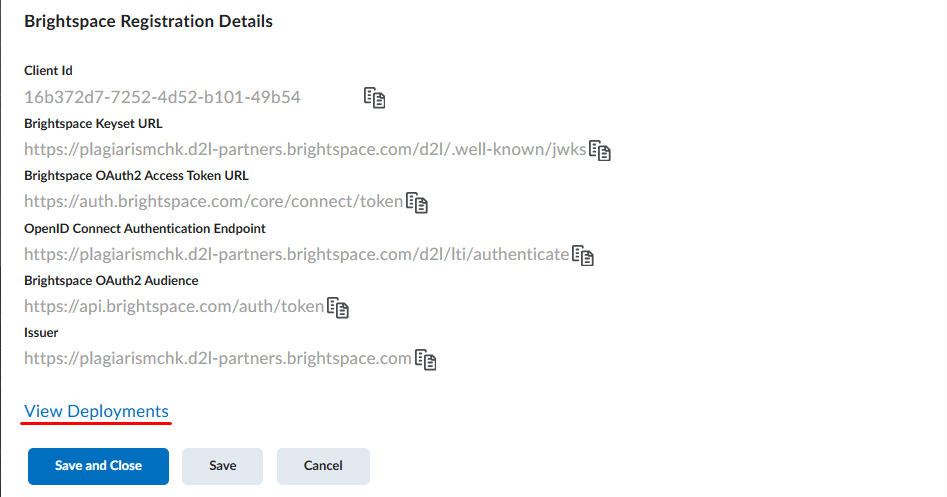
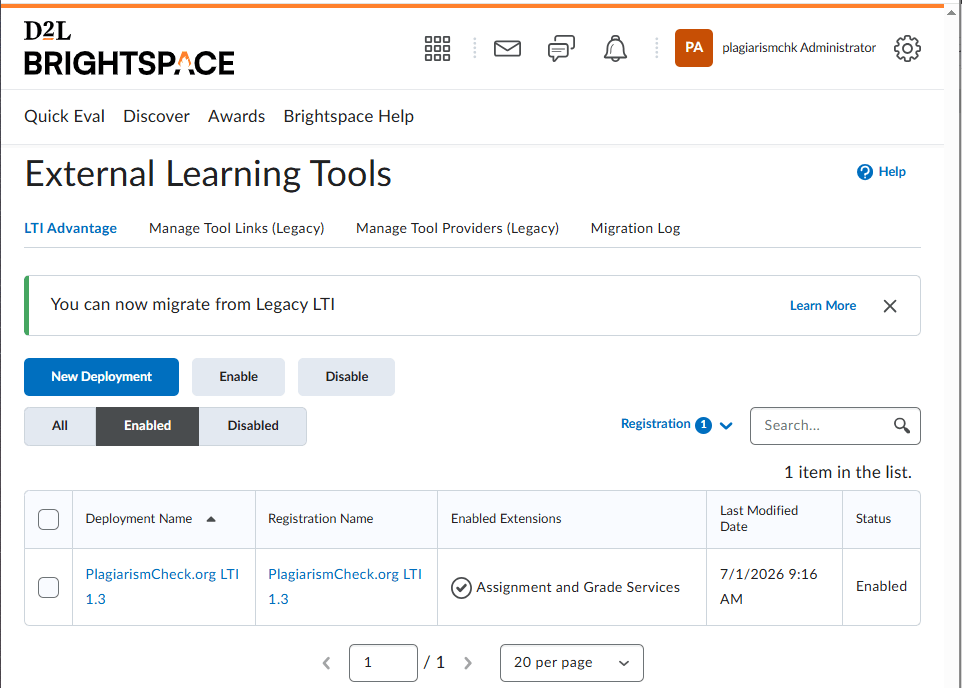
- If the deployment was created automatically, make sure its status is Enabled.
- If the deployment was not created automatically, click New Deployment. Pick the registered tool from the Tool dropdown, give the deployment a name (e.g. ‘PlagiarismCheck — All Courses’), and enable the same extensions you enabled at registration.
- Select Security and Configuration settings.
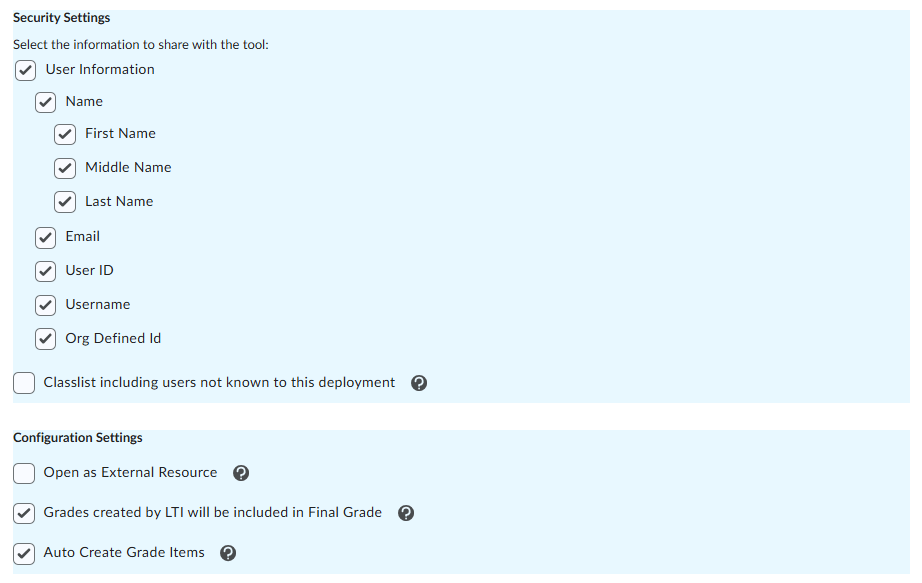
Step 7: Add org units and create
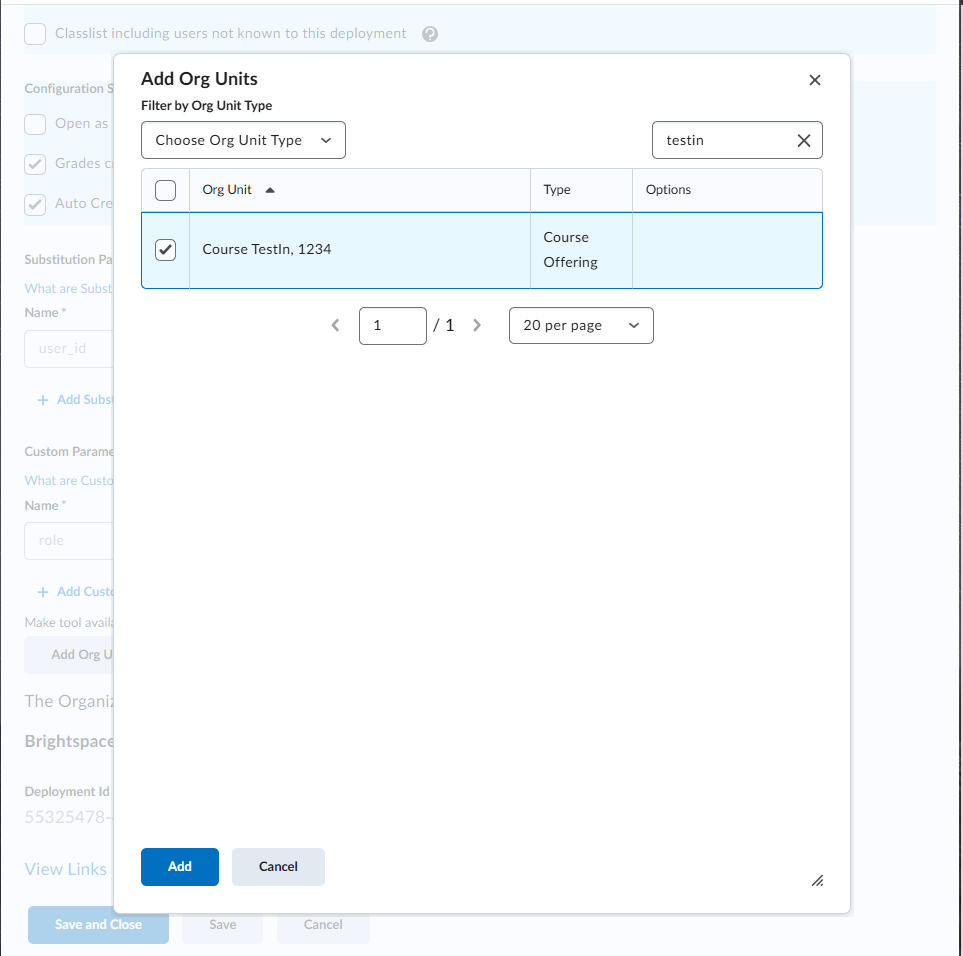
- Scroll down to Add Org Units. Filter the list by org unit type if you have many, then tick the units that should have the tool. For most institutions, picking the top-level Organization with This org unit and all descendants enables PlagiarismCheck everywhere. Click Add and then Create Deployment.
Step 8: Use it in a course
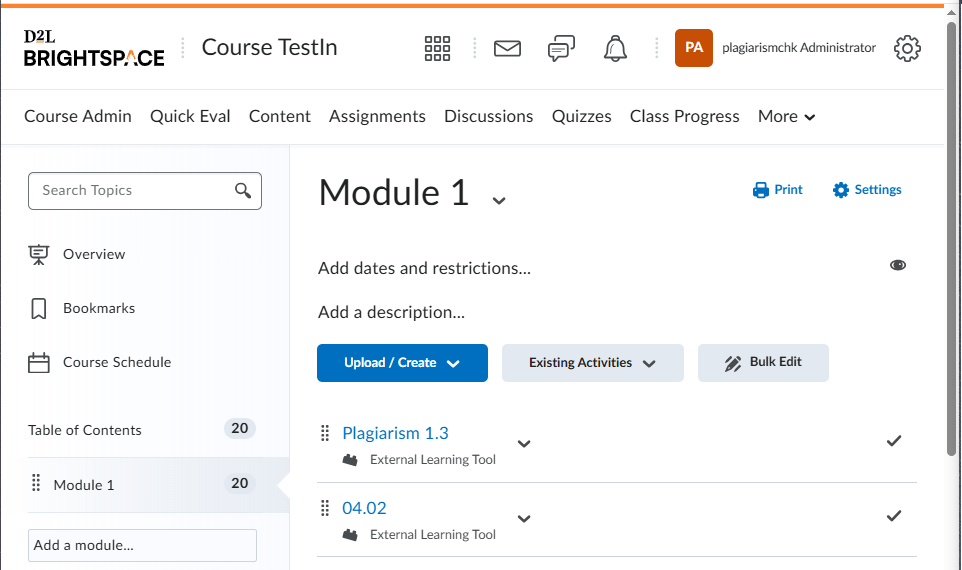
- Open any course as an instructor, go to Content , open a module, and use Existing Activities → External Learning Tools to attach the PlagiarismCheck deployment.
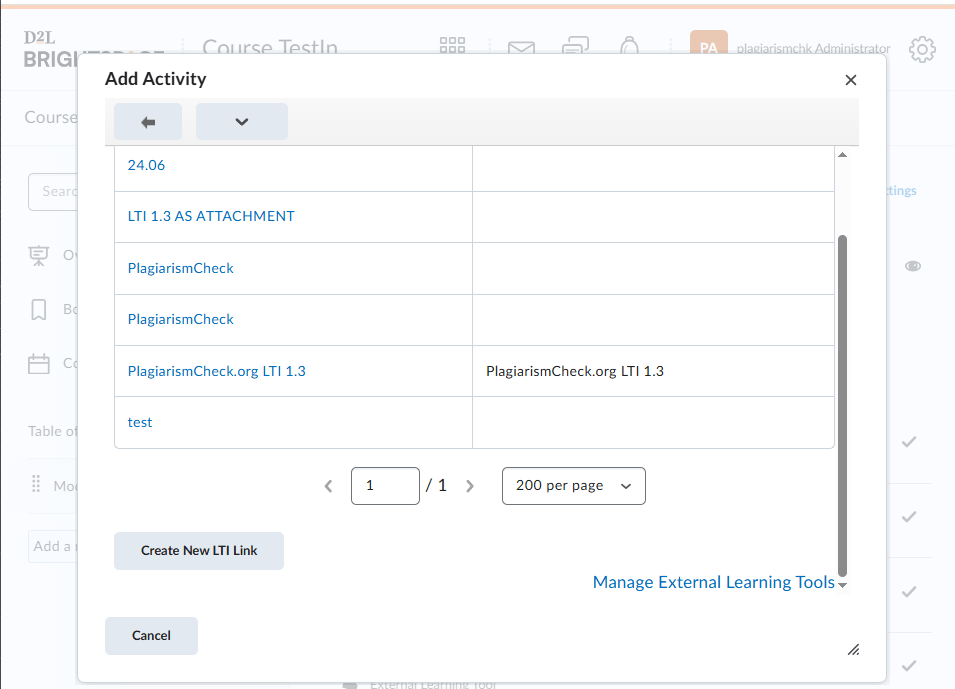
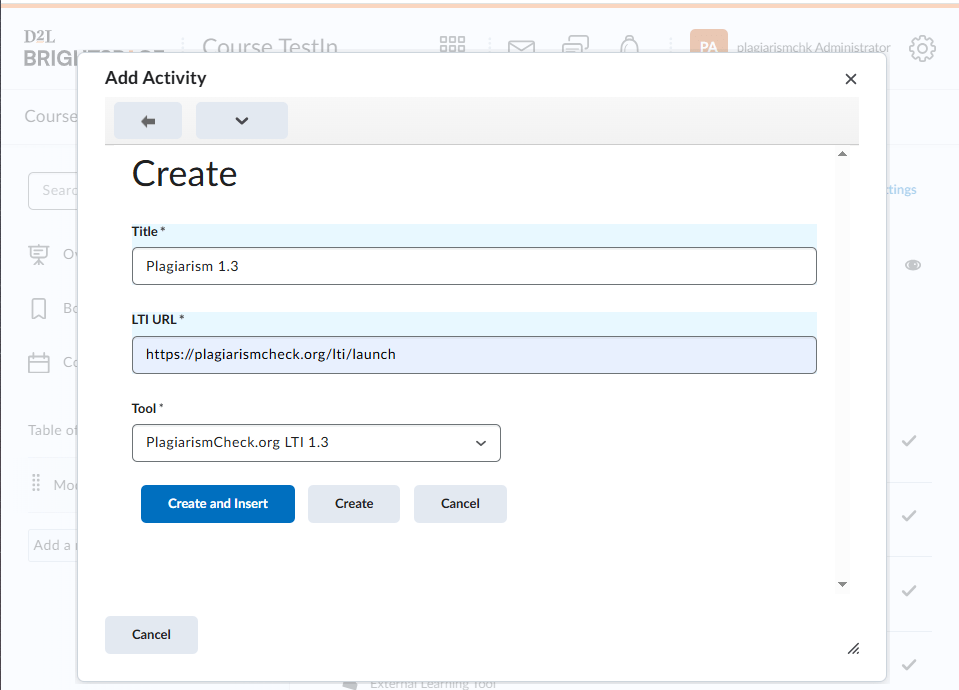
- In the window that opens, click Create New LTI Link , enter the assignment title, paste the link https://plagiarismcheck.org/lti/launch into the LTI URL field, select the created tool, and click Create and Insert.
Testing the integration
After registration, switch to a test course and create an assignment that uses PlagiarismCheck as its external tool. Submit a short sample document as a student, return as the instructor, and confirm that the originality report opens and the grade syncs back to the gradebook.
Troubleshooting
Tool stays Pending and never activates
Reopen the registration page in another tab and check that the URL you pasted into Brightspace hasn’t expired. Registration URLs are single-use; generate a new one and repeat the registration step.
Originality reports don’t appear in the gradebook
Confirm that Assignment and Grade Services and Names and Roles Provisioning are enabled on the tool. In Brightspace, verify the assignment was created with PlagiarismCheck as the submission type.
Students see an error when launching the tool
Ask the student to clear cookies for your LMS domain and retry. If the error persists, copy the error code from the launch screen and contact support@plagiarismcheck.org.
Need help?
Email support@plagiarismcheck.org — please include your institution name, the LMS version, and a screenshot of any error you see.